Ground Systems
NOS3 supports YAMCS, COSMOS 4, COSMOS 5, Fprime, and AIT ground software out of the box. There is a parameter in the master configuration file to switch between them. COSMOS 4 is lighter weight and easy to use, while COSMOS 5 is more performance heavy and slightly more difficult to use, but is actively developed.
YAMCS - Yet Another Mission Control System
Yamcs /jæmz/ is open source mission control software developed by Space Applications Services, an independent Belgian company, with a subsidiary in Houston, USA. Yamcs is developed around the criteria of flexibility and open source code to innovate, reduce MCS development, implementation and integration costs through easy expandability, scalability, and adaptability over time.
Space Standards
CCSDS/OMG XML Telemetric and Command Exchange (XTCE) v1.1 and v1.2
CCSDS 133.0-B-2 Space Packet Protocol
CCSDS Space Data Link Protocols (AOS/TM/USLP/TC frames)
CCSDS 232.1-B-2 Communications Operation Procedure (COP-1)
CCSDS File Delivery Protocol (CFDP)
CCSDS Space Link Extension (FCLTU/RAF/RCF)
YAMCS Studio Integration
Obtain the tarball appropriate to your system. Note that YAMCS Studio requires JRE for Java 11 or higher. https://github.com/yamcs/yamcs-studio/releases
Extract the tarball to your system, and you can run then ./’Yamcs Studio’ The YAMCS studio User’s Guide is a great resource for setting up these interfaces, and this is how the JSTAR team accomplished this. We’ve also created a custom OPI file for the SAMPLE application that will allow users to view how scripting works to connect buttons to commands and telemetry.
Users can create a new project within the Display Builder in YAMCS Studio, and then import JSTAR’s NOS_SAMPLE_APP.opi Select the OPI file and click the green play button to advance to the Display Runner (this will bring up the NOS Sample App OPI window). From the Options ribbon at the top, select YAMCS, and then Connect. This assumes you already have NOS3 and the YAMCS Web gui running, functional, and receiving telemetry.
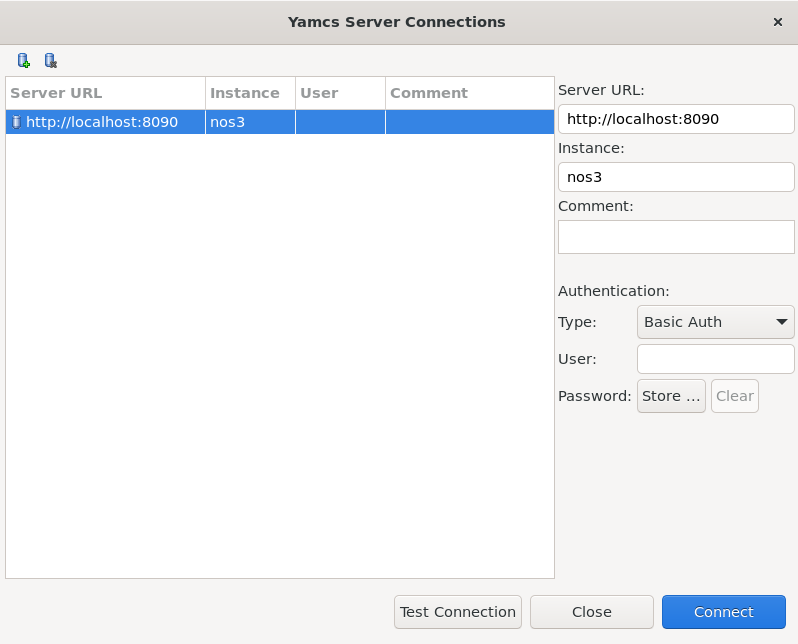
Once YAMCS has connected successfully, users should be able to run the Enable_CC command from the sample app OPI and begin seeing telemetry:

OPI Files are currently stored within gsw/yamcs-studio under the nos3 root directory.
YAMCS and OpenMCT
OpenMCT requires more user interaction to prepare and use. Below are a brief set of instructions for getting started:
Begin by installing Node Version Manager (this makes installing the appropriate version of NPM easier):
curl -o- https://raw.githubusercontent.com/nvm-sh/nvm/v0.40.1/install.sh | bash
The ~/.bashrc file must now be sourced in order to access NPM commands:
source ~/.bashrc
Install Version 21 of the Node Package Manager:
nvm install 21
Download the akhenry opnmct-yamcs repository:
git clone https://github.com/akhenry/openmct-yamcs.git
Access the repository and modify the example index.js file:
example/index.js
The YAMCS config needs to be modified to fit our YAMCS instance:
yamcsDictionaryEndpoint: "http://localhost:8090/",
yamcsHistoricalEndpoint: "http://localhost:8090/",
yamcsWebsocketEndpoint: "ws://localhost:8090/api/websocket",
yamcsUserEndpoint: "http://localhost:8090/api/user/",
yamcsInstance: "nos3",
yamcsProcessor: "realtime",
yamcsFolder: "nos3",
If NOS3 has not been set up and started, navigate (in a terminal) to the NOS3 directory and run the following:
make prep
make
make launch
Return to the openmct-yamcs repository directory.
OpenMCT YAMCS plugin dependencies can now be installed and built.
Access a terminal and navigate to the base directory of the akhenry/openmct.git repository. Then, run the following commands:
npm install
npm run build:example:master
npm start
YAMCS can also now be accessed at http://localhost:8090.
OpenMCT can now be accessed at http://localhost:9000.
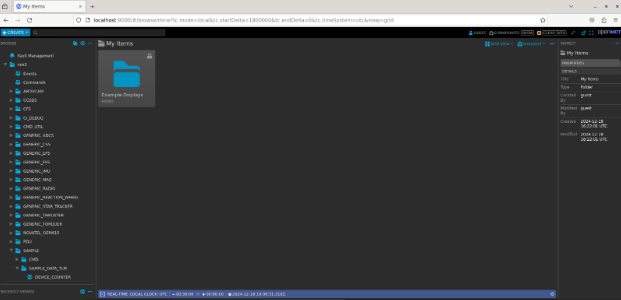
A figure like the above should be seen. From here the time window needs to be adjusted to match NOS3 time:

Click the left-most REAL-TIME LOCAL CLOCK UTC, and changed to a fixed timespan:

The timeframe needs to be set to 2025-10-18, 08:39:00
The end date can be any time after the initial start date.
Finally, click the blue checkmark.
Navigation to different applications and their telemetry data can be navigated to from the leSft menu.
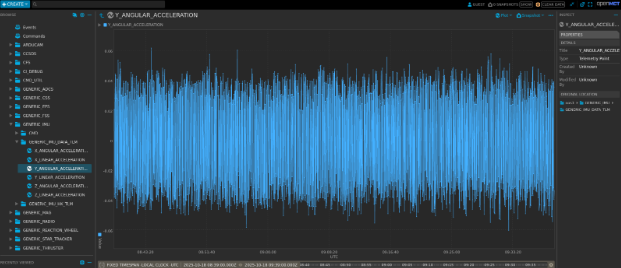
Below is an example of IMU data being displayed within the NOS3 Time window:
COSMOS 4
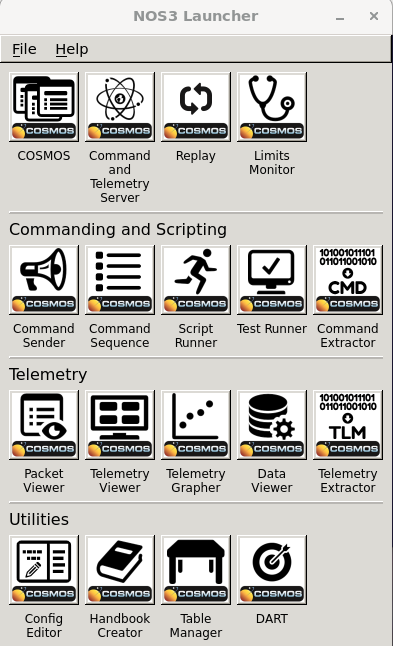
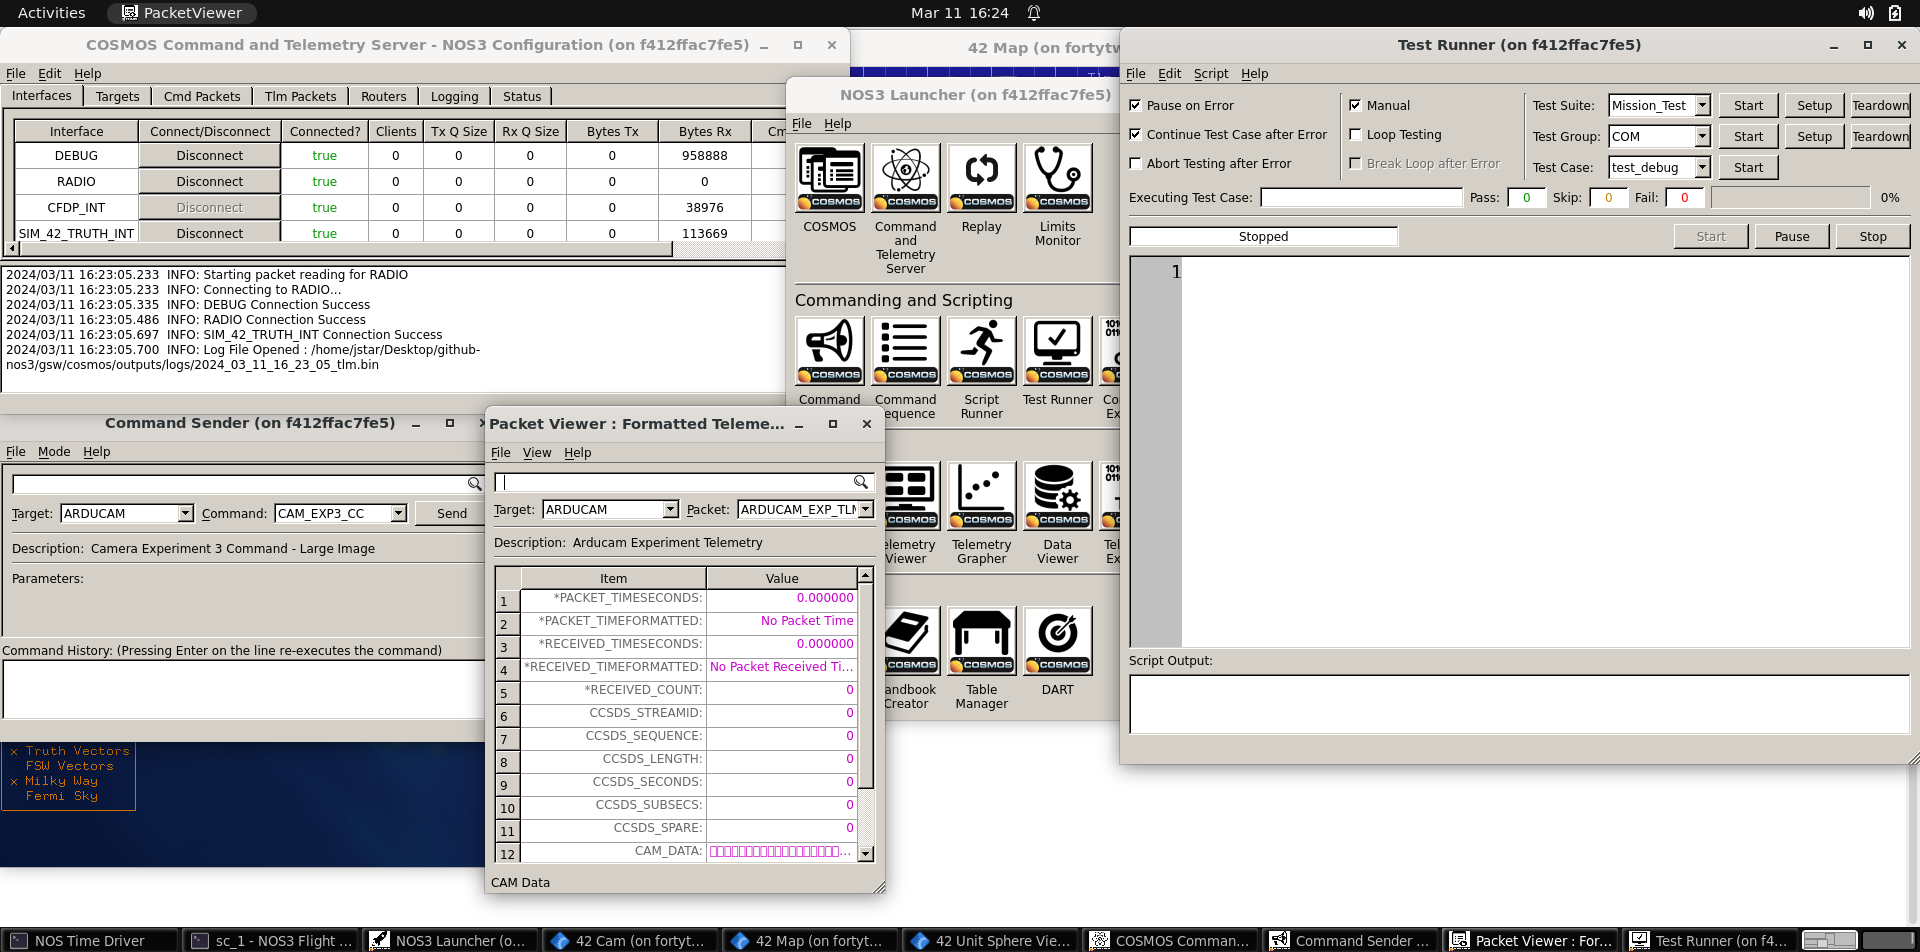
COSMOS 4 is an open-source ground system developed by Ball Aerospace (COSMOS 4) and is included with NOS3 to provide a lightweight ground system for the simulated spacecraft. COSMOS 4 is installed in its default directory and run from gsw/cosmos. The COSMOS 4 Launcher, and the windows launched by the COSMOS button are pictured below.
COSMOS 4 to cFS Command and Telemetry Link Up
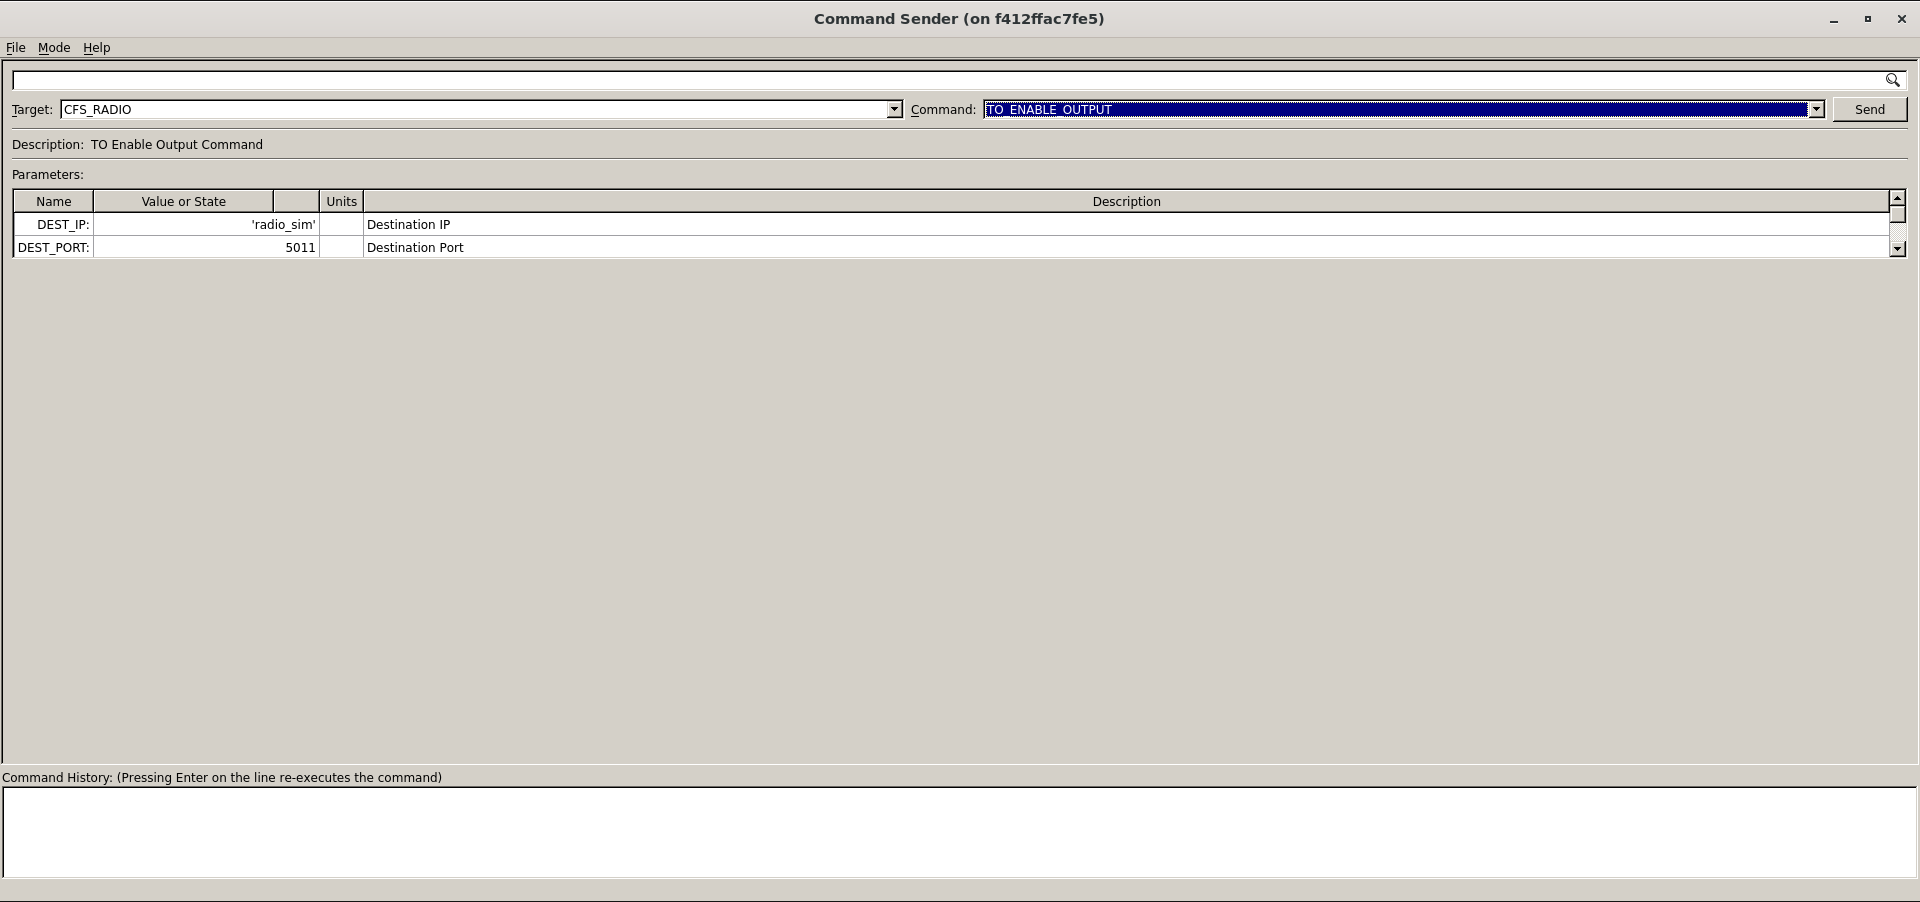
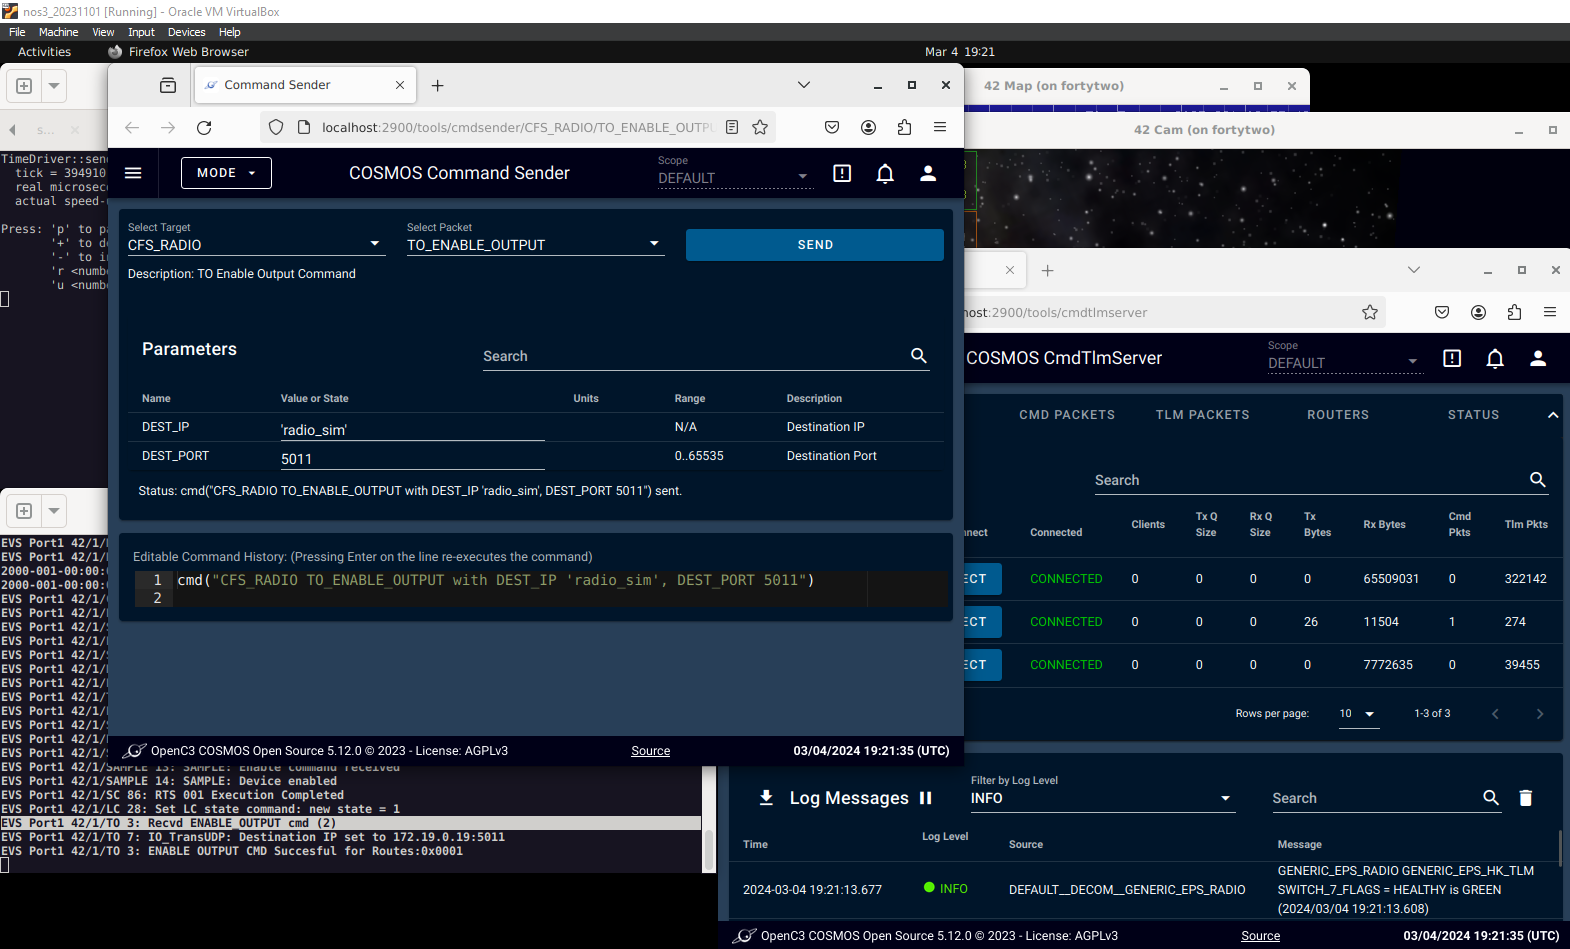
The link to a Ground Station is completed by two applications in cFS. These are the command ingest (CI) and telemetry output (TO) applications. In NOS3 these apps utilize UDP to communicate and are not meant for flight operations. Communication is further split between the Debug and Radio channels, which connect to different UDP ports; the former directly, the second through the Radio Component. The Debug CI and TO links are active by default, but the Radio TO link is closed by default on start-up and is only activated by sending a specific command packet. Commanding is achieved using the Command Sender tool (one of the core windows) in COSMOS 4, which should open up after clicking the ‘COSMOS’ Key on the launcher. The Radio TO link is enabled using the target named ‘CFS_RADIO’ with a single command to ‘TO_ENABLE_OUTPUT’. Once sent, the TO app will reply stating that telemetry is enabled, as shown in the screenshot below. It should be noted that only telemetry listed in the ‘cfg/nos3_defs/tables/to_config.c’ will be captured. Additional telemetry can be appended as necessary by editing that table.
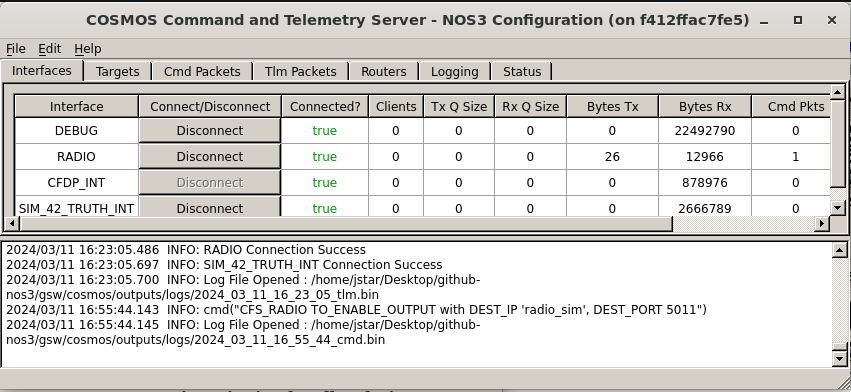
Telemetry from the Radio TO link can be confirmed by observing the values for ‘Tx Bytes’ and ‘Rx Bytes’ increasing in the ‘RADIO’ line in the COSMOS CmdTlmServer window. Additional ways to confirm successful processing of the command include examining the output of the ‘NOS3 Flight Software’ terminal window or the output of the ‘Radio Sim’ terminal window. Both windows will have frequent output when the Radio TO link is enabled.
COSMOS 5
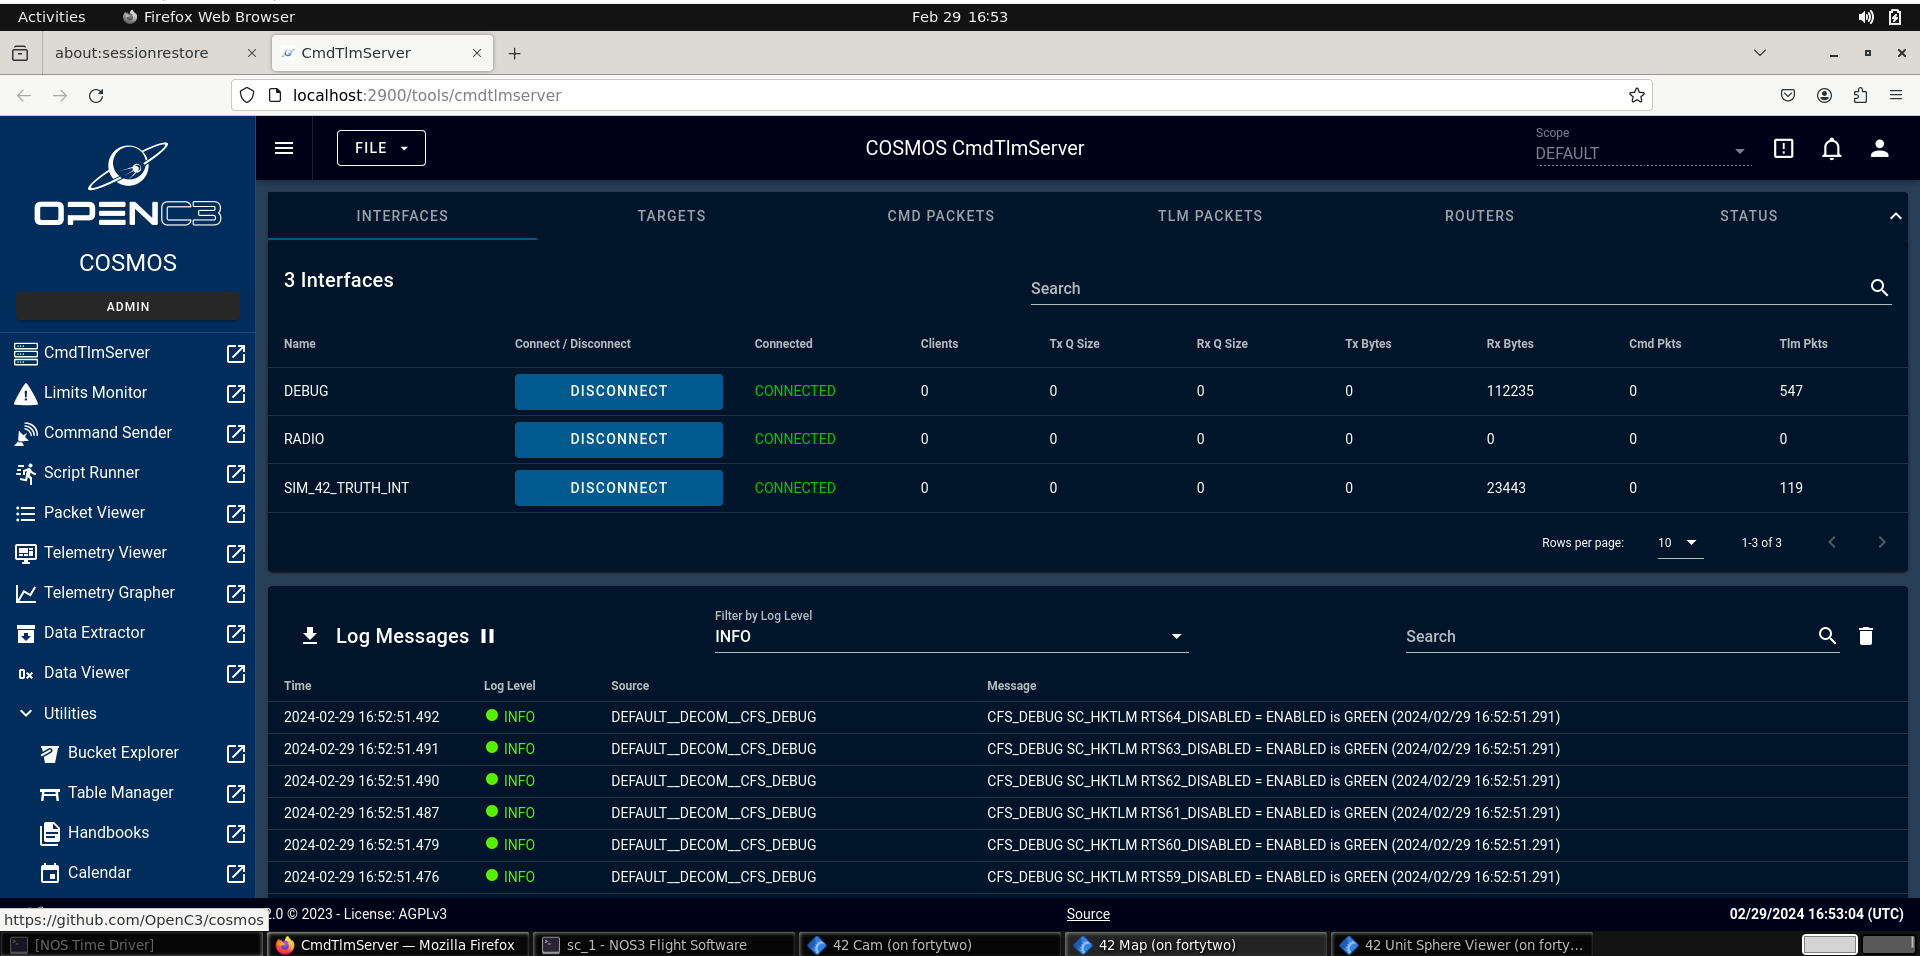
COSMOS 5 is an open source ground system provided via OpenC3 (originally developed by Ball Aerospace) (COSMOS 5) and is included with NOS3 to provide a modern, web-based ground station for the simulated spacecraft. COSMOS 5 is installed in its default directory and run from gsw/cosmos. The COSMOS 5 interface is pictured below.
COSMOS 5 to cFS Command and Telemetry Link Up
The link to a Ground Station is completed by two applications in cFS. These are the command ingest (CI) and telemetry output (TO) applications. In NOS3 these apps utilize UDP to communicate and are not meant for flight operations. Communication is further split between the Debug and Radio channels, which connect to different UDP ports; the former directly, the second through the Radio Component. The Debug CI and TO links are active by default, but the Radio TO link is closed by default on start-up and is only activated by sending a specific command packet. Commanding is achieved using the Command Sender tool in COSMOS 5, accessible from the main screen. The Radio TO link can be started using the target named ‘CFS_RADIO’ with a single command to ‘TO_ENABLE_OUTPUT’. Once sent, the TO app will reply stating that telemetry is enabled. This is demonstrated in the screenshot below. It should be noted that only telemetry listed in the ‘cfg/nos3_defs/tables/to_config.c’ will be captured. Additional telemetry can be appended as necessary by editing the table in question.
AIT
While AIT appears to be functional, it is not currently in a maintained state. It is provided merely as a proof of concept. Those pieces which are actively maintained are those in the default configuration.
F Prime GDS
FPrime (or F’) flight software is provided by JPL. It is not currently in a maintained state within the NOS3 project. It is proved currently as a proof of concept. The pieces that are actively maintained are those in the default configuration. However, FPrime will be maintained and integrated into the default configurations of NOS3 in the very near future.
Selecting Ground System
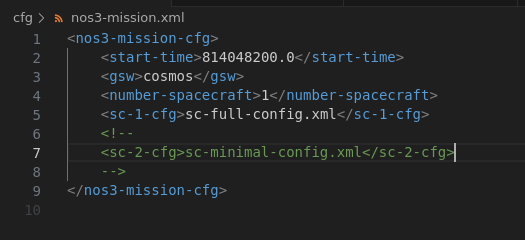
The Ground System may be selected by editing the gsw parameter in the nos3-mission.xml file (which can be found in the cfg directory). Setting the value to cosmos will select COSMOS4, and setting it to openc3 will select COSMOS 5. Setting this value to yamcs will utilize the YAMCS Ground software, and setting it to fprime will utilize the built-in Fprime GDS (currently only compatable with FPrime FSW).
The screenshot below shows the default configuration, running COSMOS 4. Note that if you’ve run NOS3 previously on your VM, you will need to rebuild NOS3 with the new GSW before it can be run. This will require running make stop-gsw to ensure the previous ground system is stopped, followed by make clean, make prep, and make before you can launch with the new ground system. docker ps can, by listing the docker processes currently running, indicate whether you have the correct GSW suite running at any given time.
Packet Formatting
Regardless of which Ground System you are using, all communications to, from, and internal to cFS are formatted using the CCSDS standard packet type with the secondary header enabled. This secondary header allows the specific command to be passed to the application specified in the primary header. COSMOS requires knowledge of these commands and telemetry structures to be able to construct and interpret them as needed. An example is provided below:
